Chapter 7: Publishing to Github Pages
Congratulations! You have created a fully responsive single-page portfolio website with a light/dark color theme switcher, all powered with HTML and CSS. Our last step is to move from CodePen to VS Code, a standard code editor. We'll then publish to a Github repository, and finally we'll have that repository display as a website on Github Pages. These are all free services, and by then end, we'll have a page for everyone to see your cool portfolio.
For those who already know how to publish to Github and Github Pages: The steps in this chapter are designed for absolute beginners who may not have familiarity with Github or Github Pages. If you already know how to publish your site using industry-standard command line tools or Github Desktop, do that now. There's no need to follow along with this chapter.
However, if this is all new to you, I will walk you through the process! We will follow the same steps we used in the Frontend Masters Bootcamp.
Getting web pages online
So far, the websites we've built have worked on the computer in front of us only. That's not much of a site if no one else can see it!
Fortunately, there is a simple and free solution to getting a website like ours online: GitHub Pages.
You will need to follow the below instructions very carefully to get this working. I've included links to additional reading if you get lost along the way.
1. Sign up for GitHub
First, sign up for GitHub.
Go to https://www.github.com and sign up for the service.
If you already have a GitHub account, make sure you are signed in.
2. Create a repository
A repository is a place where your files will be stored, similar to a folder or a directory.
- Make sure you are signed into GitHub.
- Go here: https://github.com/new
- In the Repository Name field, enter your username.github.io. For example, I am
jen4webon GitHub, so my repository name isjen4web.github.io. Add a description. The other settings should look like the ones below. Click the "create repository" button.
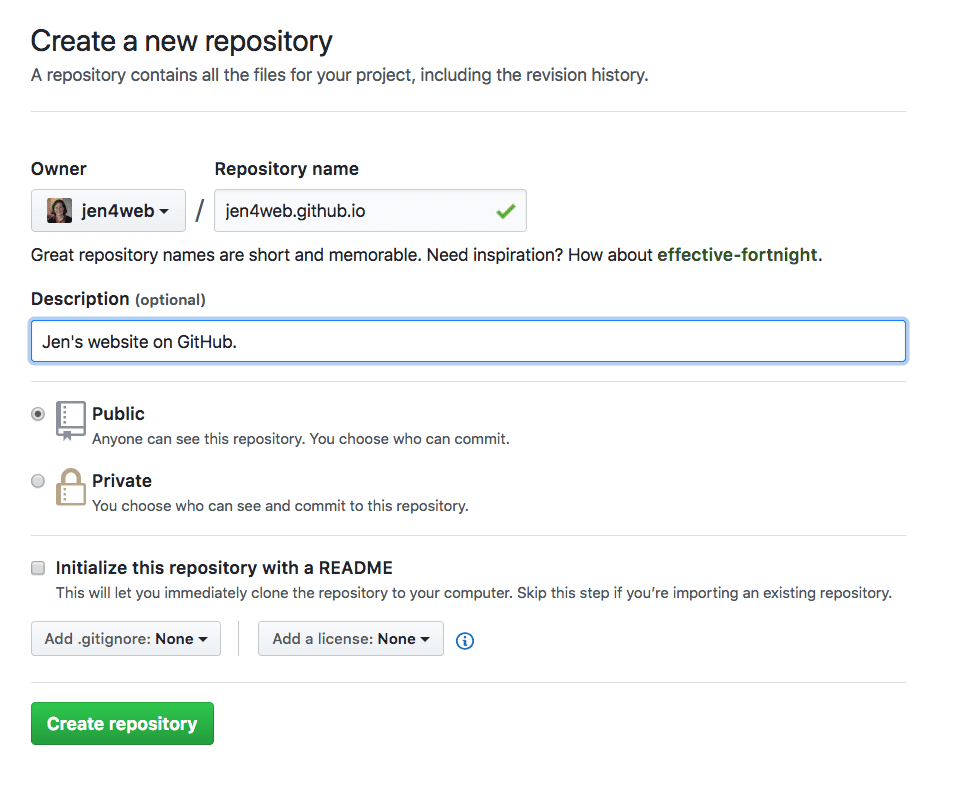
3. Download GitHub Desktop
Go to https://desktop.github.com and download the GitHub Desktop version for your computer, Mac or Windows.
Install the application on your computer.
4. Set up the repository in GitHub Desktop
Click the "Set up in Desktop" button in the next screen:
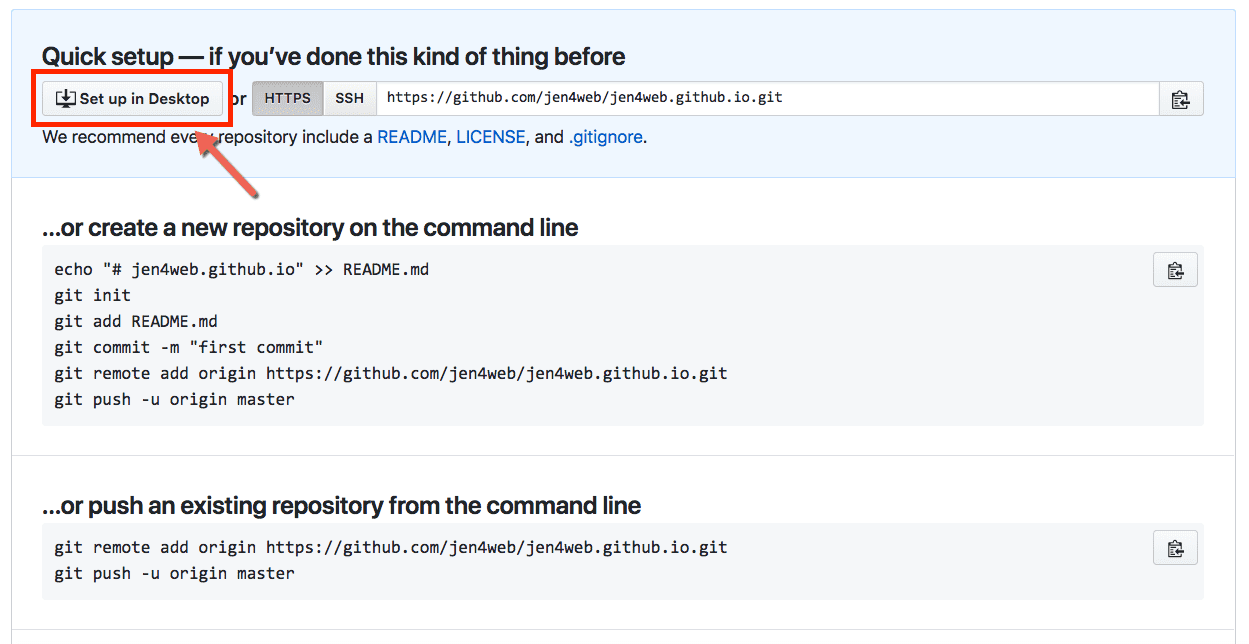
Allow GitHub Desktop to open. There is an opening configuration screen. Click on "Sign into GitHub.com".
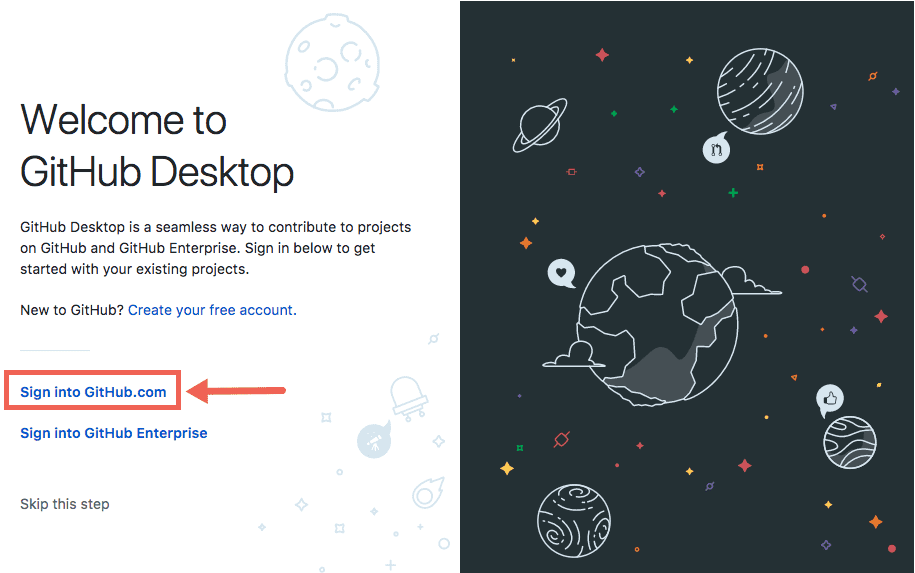
Enter your username (or email address) and password.
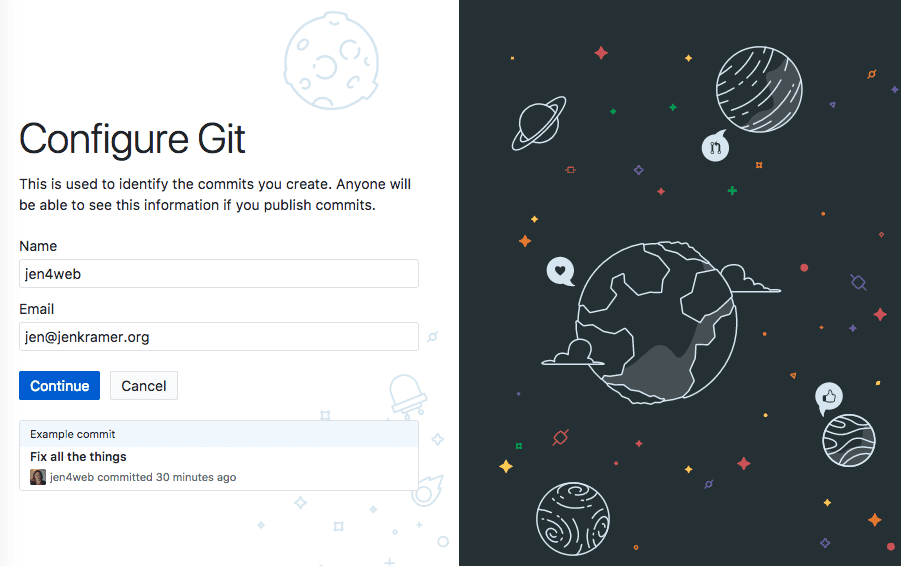
Configure your name and email as you wish, and click Continue. Click the finish button on the next screen, and you are good to go!
Now you are in GitHub Desktop, and the screen should be filled out for you on the URL tab. Choose the desktop for your local path. It will create a new folder for you on the desktop:
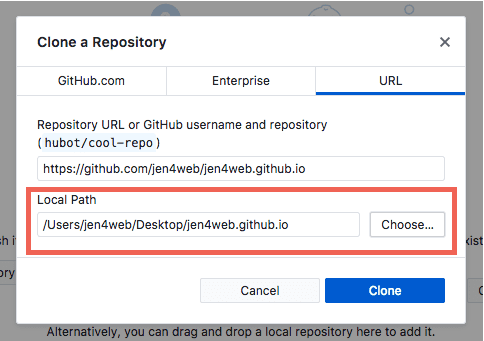
Click the "Clone" button to finish setting up GitHub Desktop.
5. Make sure your GitHub folder has all of the files you want to post online
Review the folder. Does it have all of your HTML, images, and CSS ready to post? If not, copy these files into the folder.
Make sure one file — probably your home page — is called index.html. Make sure the links to that file are correct.
Refer back to GitHub Desktop — once you've copied in your files and folders, you should see all of them listed here.
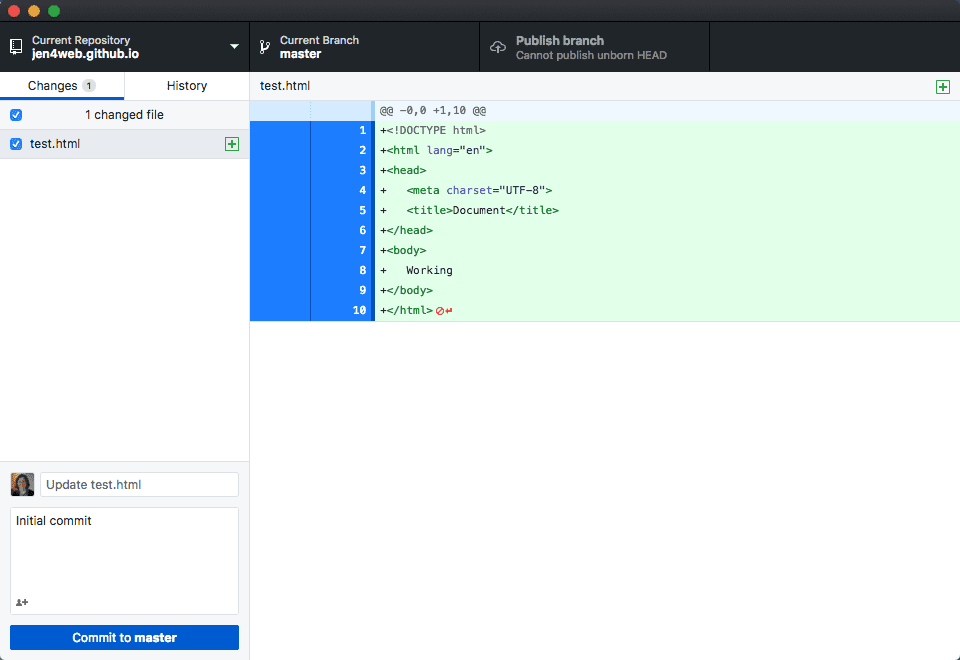
6. Make a commit note for each file in the lower left corner
A "commit" is the moment you upload these files and folders to GitHub. You are "committing" your changes to the repository.
Make a note for each item by clicking on the file name and writing a note in the lower left corner of the screen.
7. Click the "Commit to master" button and "Publish Branch" button
With notes in place, select all of your files and folders and click the blue "commit to master" button in the lower left. Then click the "publish branch" button in the black area in the upper right.
8. Look in your browser window
Open a new tab in your browser and go to https://<username>.github.io -- in my case, https://jen4web.github.io.
You should see your web page, images, and CSS styles show up on your home page.
NOTE: It can take Github Pages up to 15 minutes to show your work. If it doesn't show up immediately, get a drink of water, stretch, check your email, and then try again. Sometimes a short wait is all that's needed to "fix" your problem.
9. Waaaa, it didn't work!!!
What exactly "didn't work?"
- Did you wait for Github Pages to render your pages? This can take time!
- Did you keep the exact same file and folder structure that you had on your computer previously? If not, you broke the paths between files, and you'll need to fix that.
- Did all of your images and css upload? (Go to
www.github.com/<username>, click on Repositories, and click on the repository for this exercise. Are all of the files there and in the proper places? - Did you have a file called index.html? If not, you'll need to type in the name of that file as part of the URL. For example: http://jen4web.github.io/about.html
- Did you follow the above instructions exactly? If you named your repository something other than
<username>.github.io, it "won't work."
10. Updating files in your repository
You may want to keep making changes to your website, and you want to keep publishing those changes to your repo. To do this:
- Make all of your edits and changes in VSCode, just as you've been doing. Save your changes in the
<username>.github.iofolder. - When you're ready to post your changes, open up GitHub Desktop, and go into the
<username>.github.io repo. - Make sure the "changes" tab is selected. It should show you all changed files since the last time you posted.
- Select each file individually, make a note about what changed, and click "commit to master"
- Click the button on the top right, which might now read "fetch origin" -- but it still does the same thing.
- Check to see your changes in the browser.
Advanced additions to the site
Want to push this project further? Here's a few suggestions that you could implement to take this site to the next level. What else would be a good addition to your site?
- Add more pages? If you do, you'll need a navbar and a CSS-only hamburger button, and if needed, a CSS-only dropdown to your site.
- Add a contact form to the site rather than an email button. Code this yourself using your full-stack skills, or use a service like Jotform.
- Expand the projects section. Rather than presenting all project information on the home page, present an overview and a link to more extensive details and links as an additional page.
Congratulations!
You have an excellent start on a portfolio website. Continue to add to it with new projects and share it with the world!
If you enjoyed this course, check out Jen Kramer's other courses at Frontend Masters.